Marbelux Home Decor Kit Tutorial
This tutorial will take you through how to use your marbelux home decor kit and make the 3 molds; oval tray, striped jar and striped vase.
Otherwise click here for the marbelux PDF detailed instructions.
Bubbles Tutorial
This tutorial will guide you through how to prevent bubbles when working with marbelux Eco Resin for a perfectly smooth finish.
Otherwise, click here for the marbelux PDF detailed instructions.
Marbling Tutorial
This tutorial will show you how to create a stunning marble effect using marbelux Eco Resin.
Otherwise, click here for the marbelux PDF detailed instructions.
Terrazzo Tutorial
The tutorial below will take you through how to create a terrazzo-style finish with marbelux Eco Resin.
Otherwise, click here for the marbelux PDF detailed instructions.
Splatter Tutorial
This tutorial will show you how to create a fun splatter effect using marbelux.
Steps:
1. Measure 10.3 oz marbelux for oval tray mold (7.8 oz powder + 2.6 oz liquid)
2. Mix for 1-2 minutes
3. Mix in your water based pigments
4. Splatter your first chosen color
5. Wait 60 minutes to harden, so that the splatter doesn't bleed into 2nd pour.
6. Fill up mold with second color
7. De-mold 30-60 minutes later!
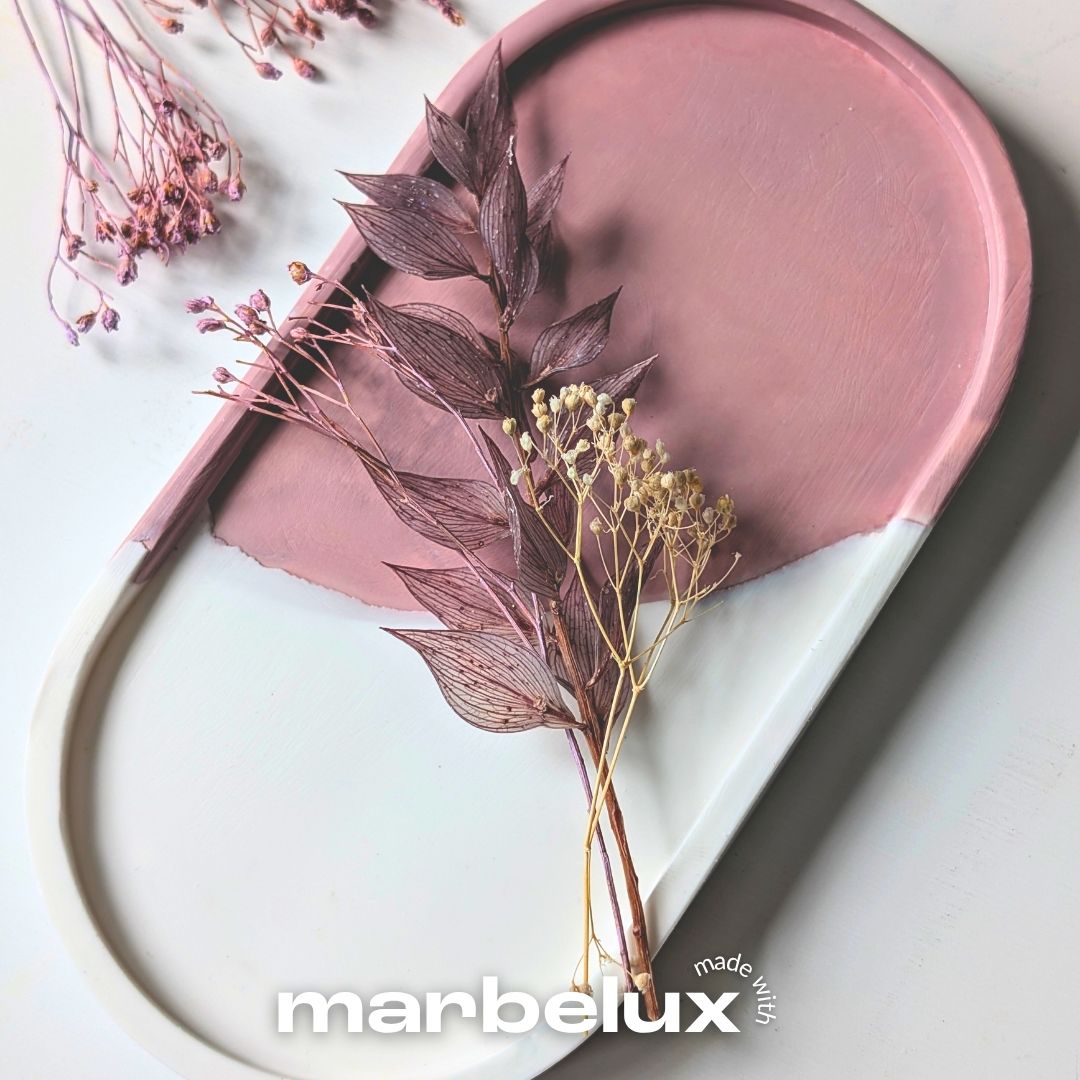
Split Marble Tray Tutorial
This tutorial will show you how to create a beautiful half & half split marble tray using marbelux.
Steps:
1. Measure 10.3 oz marbelux for oval tray mold (7.8 oz powder + 2.6 oz liquid)
2. Mix for 1-2 minutes
3. Mix in your water based pigments
4. Fill the oval tray completely
5. Wait 60 minutes to harden before demolding
6. Snap the tray in half and place one half back into the oval tray mold
7. Mix 5.1 oz of marbelux (3.9 oz powder + 1.3 oz liquid)
8. Create a marble effect using our pigments
9. Pour into the other half of the tray
10. De-mold 30-60 minutes later!
Make Your Own Sealant Tutorial
In this tutorial we will be walking you through how to make your very own natural sealant. The sealant is perfect for coating your pieces to help make them more vibrant and also water resistant!
You will need:
- 3.5 oz white beeswax (like this)
- 5.3 oz coconut oil
- Essential oil for fragrance (optional)
- Kitchen scales
- Stirrer
- Gloves
- Microwave (to melt beeswax/coconut oil)
Please note, we don't recommend coating the inside of candle holders. This is also a natural sealant, so won't be 100% effective in the long term.
From the blog
View all